Running workflows in REANA
Last updated on 2024-12-30 | Edit this page
Estimated time: 30 minutes
Overview
Questions
- What is REANA and how does it enhance the reproducibility of scientific research?
- How does REANA leverage containerization technology and cloud computing resources to simplify the management of computational environments and data dependencies?
Objectives
- Understand how to define, execute, and share complex data analysis workflows using REANA.
- Learn how REANA leverages containerization technology and cloud computing resources to simplify the management of computational environments, data dependencies, and execution pipelines.
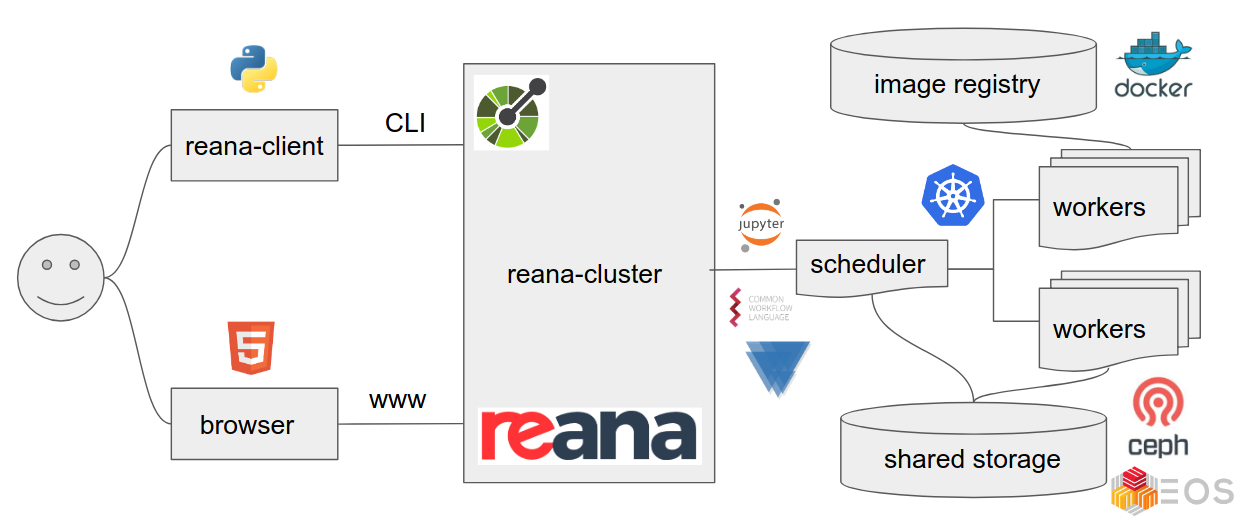
REANA is a powerful platform designed to streamline and enhance the reproducibility of scientific research, particularly in high-energy physics analysis. It enables researchers to define, execute, and share complex data analysis workflows, ensuring that their work is transparent, verifiable, and easily replicated. By leveraging containerization technology and cloud computing resources, REANA simplifies the management of computational environments, data dependencies, and execution pipelines. This tutorial will guide you through the essential steps of using REANA, from creating your first workflow to deploying it on a remote computing infrastructure. REANA offers a user-friendly approach to reproducible research, empowering you to focus on scientific discovery while automating the underlying infrastructure.

While REANA is primarily a tool for reproducible analysis, it effectively functions as a comprehensive analysis facility, seamlessly integrating various CERN resources. This means that essential CERN tools, including EOS, CVMFS, Kerberos, Rucio, VOMS-proxy, HTCondor, can be directly accessed within the REANA platform, streamlining the analysis process and simplifying resource management.
Understanding the Basics
REANA offers flexibility in workflow management by supporting multiple systems like CWL, Serial, Yadage, and Snakemake. While there’s a growing adoption of Snakemake within the LHC community due to its large external user base and strong support, REANA remains agnostic to the chosen workflow system. However, due to its popularity and powerful features, we will primarily focus on Snakemake throughout this tutorial.
Defining a workflow for REANA
While a Snakemake worflow is defined in a snakefile, in REANA one needs to create a REANA file to include all the parameters that the snakemake workflow will need.
Let’s retake the previous SUSY example, and try to run it using
REANA. First we need to write a reana.yaml file:
YAML
version: 0.9.3
inputs:
  directories:
    - SUSY/
  parameters:
    input: inputs.yaml
  files:
    - Snakefile
workflow:
  type: snakemake
  file: Snakefile
  resources:
    cvmfs:
      - cms.cern.ch
workspace:
  retention_days:
    output/*: 30
outputs:
  directories:
    - output/
The reana.yaml file acts as a blueprint for your REANA
workflow, defining essential information for execution.
-
version(optional): Since REANA is under development, specifying the version used (e.g.,0.9.3at the time of writing) can be helpful for troubleshooting. -
inputs: This section defines the files, folders, and parameters your workflow requires. Remember that we need to upload all necessary files before the workflow runs.-
directoriesandfiles: Specify the files and folders to be uploaded to the REANA platform. -
parameters: In this example, workflow parameters are defined in a separateinputs.yamlfile, so we reference the input file here. You can also define parameters directly within reana.yaml.
-
-
workflow: This crucial section tells REANA about the type of workflow you’re using.-
type: we are usingsnakemake, but REANA supports CWL, Serial or Yadage. (More here). -
file: This defines the location of your workflow script. -
resources: Define any global resources required for your workflow execution (detailed information available at here). Remember that you can also define dedicated rule resources in the snakefile.
-
-
workspace(optional): Here, you can set options likeretention_daysto specify how long specific folders should be retained after workflow completion. -
outputs: This section informs REANA which files or folders should be made available for download after successful workflow execution. These can be individual files or entire directories.
More about reana.yaml files can be found
here.
Running a workflow in REANA
Let’s get familiar with the steps necessary to run our workflow in REANA. First, activate the REANA environment, and then remember to set these variables:
export REANA_SERVER_URL=https://reana.cern.ch
export REANA_ACCESS_TOKEN=xxxxxxxxxxxxxxxxxxxxxxx
This needs to be done every time you start a session. Then, the REANA client contains a similar validation than Snakemake’s dry-run, we can run:
OUTPUT
Building DAG of jobs...
[WARNING] Building DAG of jobs...
Job stats:
job            count
-----------  -------
all                1
datacarding        1
skimming           1
total              3

[WARNING] Job stats:
job            count
-----------  -------
all                1
datacarding        1
skimming           1
total              3

==> Verifying REANA specification file... /srv/reana.yaml
  -> SUCCESS: Valid REANA specification file.
==> Verifying REANA specification parameters...
  -> SUCCESS: REANA specification parameters appear valid.
==> Verifying workflow parameters and commands...
  -> SUCCESS: Workflow parameters and commands appear valid.
==> Verifying dangerous workflow operations...
  -> WARNING: Operation "cd /" found in step "skimming" might be dangerous.
  -> WARNING: Operation "cd /" found in step "datacarding" might be dangerous.
This step verifies first if the snakefile contains a workflow that
can be run, and second it verifies that the inputs in the
reana.yaml file are correct. If everything looks ok, we can
create a workflow called test_SUSY within the platform:
Remember that this step will only create the workflow within REANA, you can verify it by looking at https://reana.cern.ch/ or by running:
The next step is to upload the files the workflow needs:
and finally we can make it run:
Again, you can check the status of your jobs via the REANA website or
with reana-client status -w test_SUSY.
Unfortunately, not yet
But before throwing your laptop out the window, don’t worry, this failure actually highlights a key feature of REANA. Let’s explore what happened and how to proceed.
More advance REANA commands
In case your workflow did not run succesfully, it is useful to look a
the log files of your jobs. In the reana-client you can
do:
The Easiest Way: The REANA Web Interface
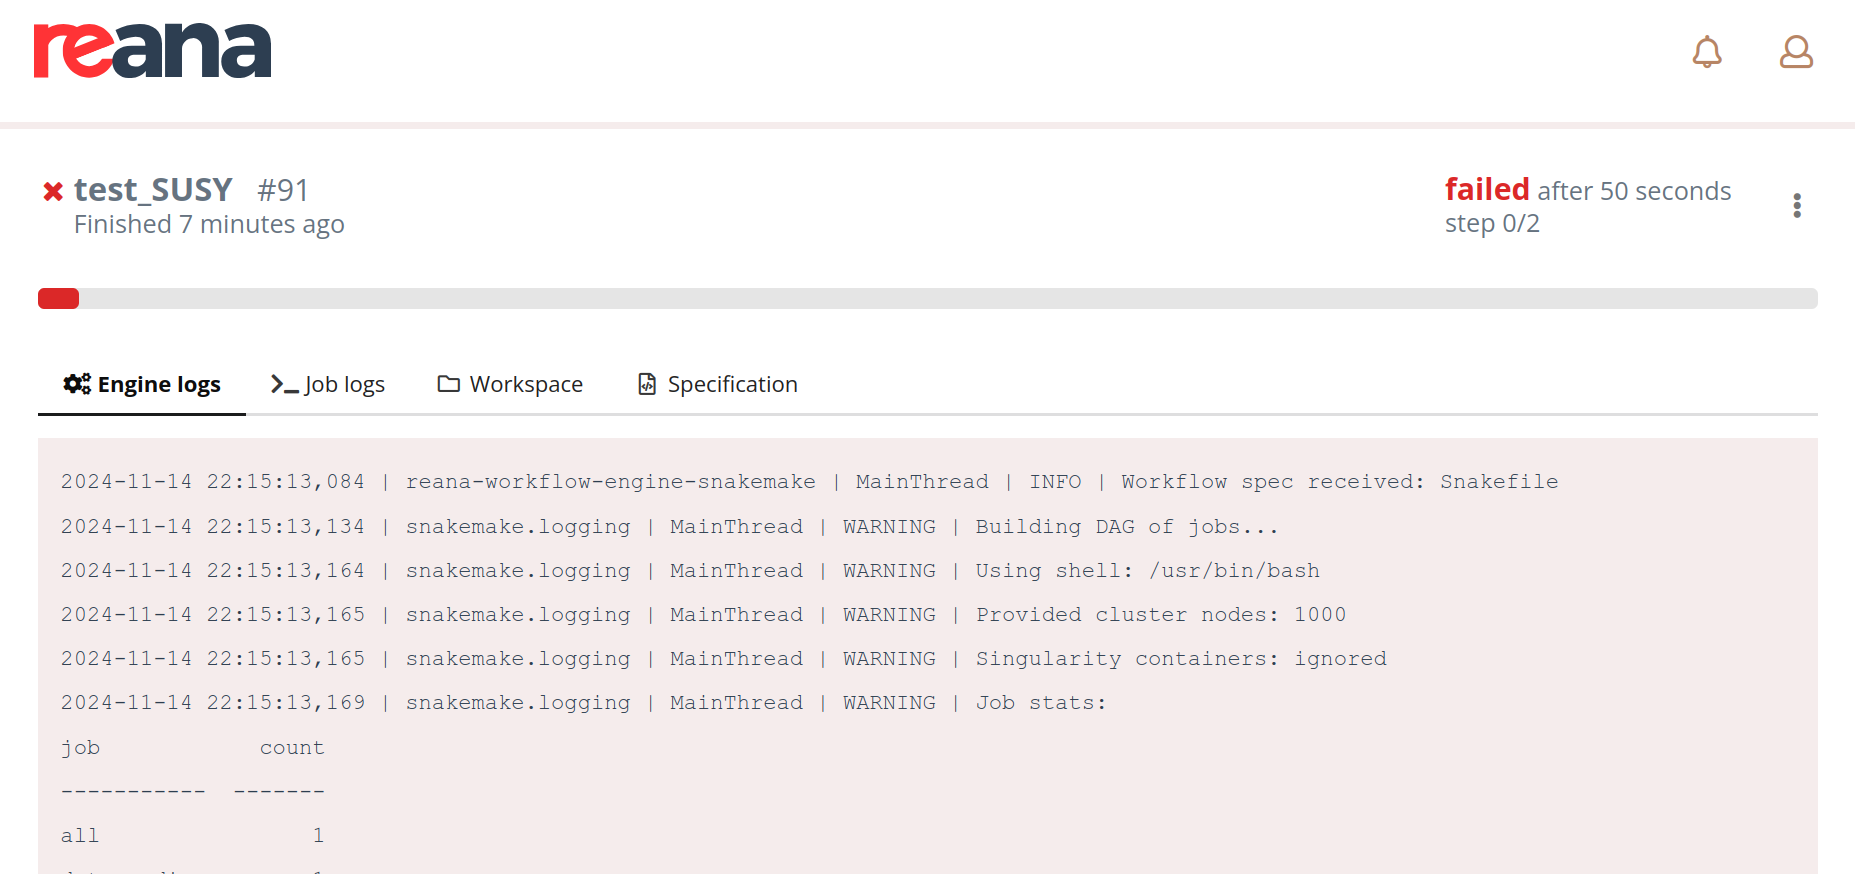
The most user-friendly way to monitor your workflow is through the REANA web interface. Your job’s interface should look similar to this:

This interface provides valuable insights into your workflow’s status and execution:
- Engine Logs: These logs offer a high-level overview of the workflow’s progress within the REANA Kubernetes cluster. They can be useful for experienced users who want to delve deeper into the technical details.
- Job Logs: Here, you can view the detailed logs for each individual step or rule (in Snakemake terminology) of your workflow. These logs are essential for troubleshooting specific issues.
- Workspace: This section allows you to navigate through the files uploaded to your workflow. It’s a handy tool for debugging and downloading specific files as needed.
- Specification: This provides a high-level overview of your workflow’s configuration in a Python dictionary format. This can be useful for understanding the workflow’s structure and parameters.
Are you getting this error:
OUTPUT
job: :
 mkdir: cannot create directory ‘./output’: Permission denied
Error in <TFile::TFile>: file /code/CMSSW_13_0_10/src/./SUSY/DY.root does not exist
A key feature of REANA-like platforms is that your workflow must be self-contained within the REANA environment. This means that your workflow needs to access its input files and write its output files to specific locations within the REANA workspace.
In this example, notice the following lines at the beginning of the Snakefile:
# Define output folder
# output_dir = "$REANA_WORKSPACE"
output_dir = "."
The commented-out line output_dir = "$REANA_WORKSPACE"
demonstrates how to correctly specify the output directory using a REANA
environment variable. REANA provides several environment variables to
help you interact with the platform. A comprehensive list of these
variables can be found in the REANA documentation.
It will be nice to have a list of REANA variables
This example demonstrates how to make modifications to your REANA
workflow. In this case, after correcting the output_dir in
your Snakefile, you’ll need to reupload the file to the
REANA platform.
To reupload the modified Snakefile, use
the following command:
You can upload multiple files as needed. Once you’re satisfied with the updated files in your REANA workspace, you can resubmit the workflow:
You can monitor the status of your workflow either through the
command line or the web interface. Note that the workflow name will now
include a number (e.g., test_SUSY.1). This indicates that
you’re running a modified version of the original workflow.
Finally yes!
Checking Workflow Outputs and Reports
Once your workflow completes successfully, you can access its outputs.
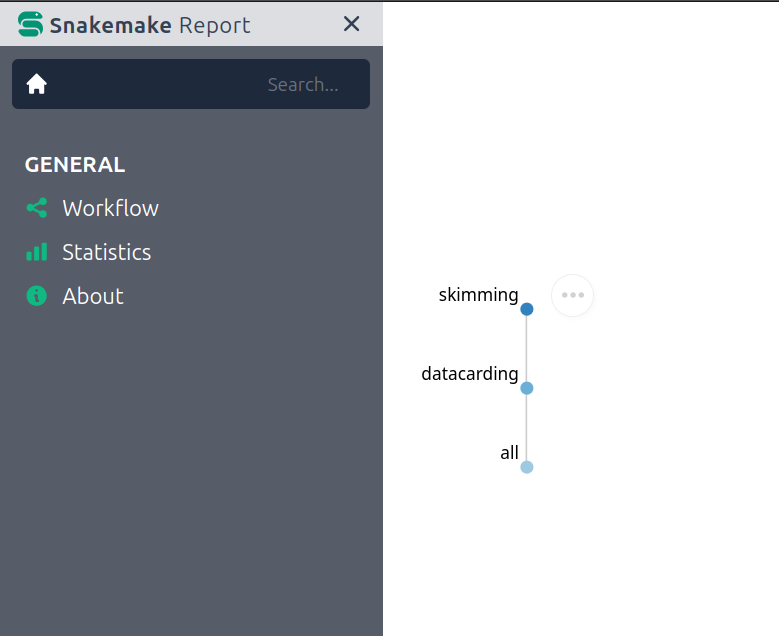
Viewing the Snakemake Report:
A valuable feature of REANA’s Snakemake integration is the generation
of a detailed report. In the REANA web interface, navigate to the
Workspace section and locate the report.html
file. This HTML file provides valuable insights into your workflow’s
execution, including statistics and visualizations.

Downloading Workflow Outputs:
To download the workflow’s output files, you have two options:
- Manual Download:
- Navigate to the Workspace section of the REANA web interface.
- Click on the desired files to download them individually.
- Command-line Download:
- Use the following command to download all output files specified in the reana.yaml file into a compressed ZIP file:
Remember that the download command will only retrieve
the files explicitly listed in the outputs section of your
reana.yaml configuration.
- REANA is more than just a platform for reproducible analysis; it’s a comprehensive analysis facility capable of handling large-scale high-energy physics workflows.
- To ensure reproducibility, it’s crucial to make our workflows independent of the specific analysis facility, such as REANA.
